

The pillars and roof are the two important factors for constructing a home that provides protection against external elements. So, exploring the newest innovations in roofing materials is very essential. A good selection of roofing shingles also adds to the exquisite appeal of our house. The selection of roofing involves various factors like lifespan, durability, weather conditions, maintenance, cost, and budget. This article covers everything needed to choose the perfect roof shingle material, information on different types of materials available, and the factors that need to be considered while making decisions and how to install roof shingles.
The reason for Shingle roofing
The roofing shingle provides a waterproof barrier against various changing weather such as extreme heat, heavy rain, or very windy snowfall conditions. The pattern, texture, and color add to the aesthetic value of both the commercial and residential buildings. It enhances the life of the building by roof sealant on all corners and over the edges to prevent leakage and dripping of water.
Types of roofing shingle
Asphalt roofing
The Asphalt sheet is made of a fiberglass base with a top layer of asphalt and mineral granules. The affordability and easy installation make it a popular and reliable choice for homeowners. It can withstand varied weather conditions and also provides protection against fire, and UV rays from degradation. The Asphalt roof shingle passes through a strengthening process by oxidising it with blowing hot air thus increasing its viscosity. The shingles are manufactured in strips for good drainage and packaged in bundles for easy transportation. The overlapping rows of shingles on the roofs during installation make it more resistant.
Wooden Shingle
The wooden shingle comes with two options – wood shakes or wood shingles. It depends upon the type of wood that their longevity depends on. Wood shakes are usually sawn off and hand split, made of Cedarwood, and are costlier than wood shingles. If properly maintained, wood shakes last for 30-40 years, whereas wood shingle lasts for 15- 40 years. The wood shingle roofing gives a natural, rustic look. The wooden shingles are easy to install and repair. But the cost of installation is higher than Asphalt. Periodic maintenance is important and involves a lot of time and money.
Metal Shingles
Metal roofs are available in various styles for homeowners who prefer a long-term investment. The metal roofs are lightweight and fire-resistant, with good longevity. The most environment-friendly roofs are solar roofs and green roofs, which are costlier and professional installation but are sustainable and offer good insulation. Metal Shingles are basically made of aluminum, steel, tin, and zinc, which provide a longevity of 50 – 75 years.
Rubber Shingles
Fibre-reinforced plastic (FRP) and Polyvinyl chloride (PVC) is the most excellent options for roofs nowadays. The pricing of rubber roof sheets, FRP, and PVC are much more than other sheets, but their durability, low maintenance cost, lightweight, transparency, and corrosion resistance make these the most demanding roofing solutions. Depending on the type of rubber, an approximate cost would be around Rs.300 to 650 square feet.
Slate, Clay and Concrete Roofing Tiles
If someone is looking for elegant, eco-friendly, durable, and excellent insulation, they can choose between slate, clay, and concrete tiles as roofing material. It provides visual appeal, expressing the unique taste of homeowners, but is heavier, brittle, and a bit difficult to repair. A good frame or support is essential for installing these tiles, so it is not budget-friendly. The cost of clay roofing ranges from Rs.30 to 100 per square foot.
Pros of Roofing Shingle
- Shingles are easy to acquire and are affordable.
- Shingles are easy to Shingles and can be customized according to the need.
- They are environmentally friendly.
- Shingles are usually used for steep-sloped structures that give a rustic look.
- The maintenance cost is low and is durable and long-lasting.
- They are lightweight and easy to transport.
- Shingles prevent waterlogging and rainwater easily falls on the ground.
- They reduce the amount of heat thus reducing the room temperature.
- Shingles come in varied colors and designs so can be customized.
- They provide protection from fire.
Cons of Roofing Shingle
- Strong high-speed winds uplift and damage the shingles.
- The dew droplets and moisture leads to the growth of moss on the shingles. This gradually damages the roof.
- Selection of Shingles is important because longevity depends on the quality of the material in a particular area.
- Asphalt shingles absorb heat so increases the room temperature in hot places.
Selection of the right Roofing Shingle
The selection of the best roofing material depends on the environmental condition, the weight of the roofing sheet, its durability, maintenance cost, energy efficiency, and the budget of homeowners. Like in hot and sunny climates, clay, slate, concrete, and wooden roofing are ideal because they reduce heat. In places with heavy rainfall or snowfall, water resistance and resistance to snowfall load are essential, so asphalt, metal, or slate roofs are ideal. In such places, durability and maintenance costs are the prime factors that need to be prioritized. The choice of roof material impacts the value of our home. So, the warranty covered by the manufacturer plays a vital role in making the correct decision. Shingles comes in various colours and patterns so choosing the right roofing material according to the style of the building is essential.
An expert guide for installing roofing shingle
Roofing shingles are an essential part of any home, providing protection and aesthetics. Proper installation is crucial for the longevity and performance of the roof. Here’s a comprehensive guide on how to install roofing shingles.
Gather the necessary tools and material
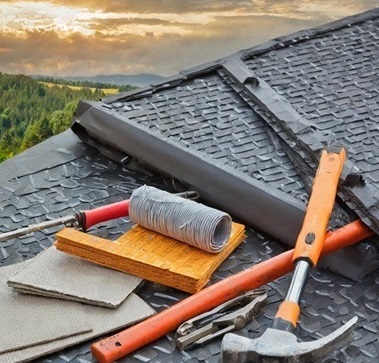
Before you begin the installation process, make sure you have all the necessary materials and tools. These typically include roofing shingles, roofing nails, a hammer, a utility knife, a chalk line, a ladder, and roofing cement.
Preparing the roof for replacement

Start by preparing the roof surface. This involves removing any old shingles, nails, and debris. Ensure that the roof deck is clean, dry, and free of any protruding nails or other objects that could affect the installation of the new shingles.
Take proper measurement before installation
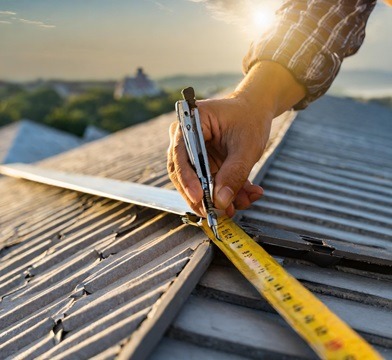
Before installing an accurate measurement needs to be taken so as to ensure that the newly shingled roof appear smooth and flat when finished. And all the gaps and holes can be properly fixed.
Install Drip Edge and Underlayment

Next, install a drip edge along the eaves of the roof. The drip edge helps to direct water away from the fascia and protects the underlying wood from moisture. After the drip edge is in place, cover the entire roof with an underlayment. This provides an extra layer of protection against water infiltration.
Apply starter shingles after selecting
Begin the shingle installation process by applying starter shingles along the eaves of the roof. These starter shingles provide a secure edge for the first row of full shingles to attach to. Ensure that the starter shingles overhang the eaves by about 1 inch to prevent water from seeping into the roof deck.
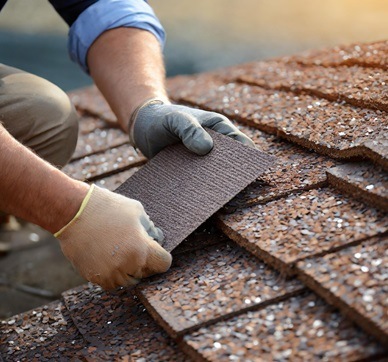
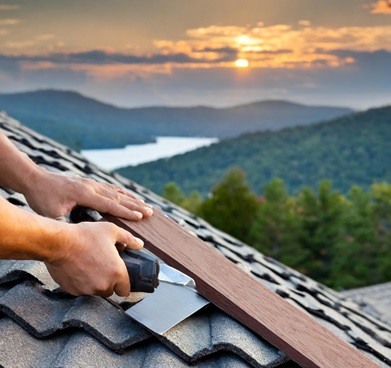
Install the shingles
Now it’s time to install the shingles. Start at the lower edge of the roof and work your way upwards. Use a chalk line to create straight, horizontal guidelines to ensure that your shingles are aligned correctly. Nail each shingle in place, using four nails for standard asphalt shingles. Be sure to follow the manufacturer’s guidelines for nailing patterns and placement.
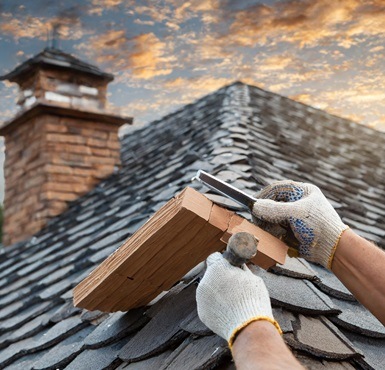
Cut and fit shingles
As you reach the top of the roof or encounter obstacles such as vents or chimneys, you’ll need to cut and fit the shingles to accommodate these features. Use a utility knife to trim the shingles to the appropriate size and shape, allowing for a snug fit around these obstacles.
Install ridge vents and cap shingles
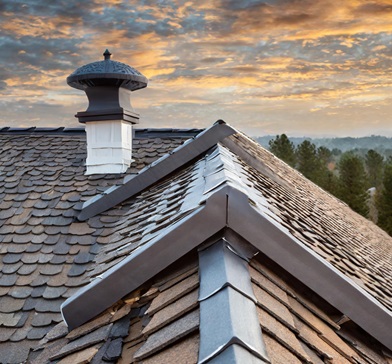
Once the main body of the roof is covered, it’s time to install ridge vents along the peak of the roof. These vents help to ventilate the attic space and regulate temperature. After the vents are in place, cap the ridge of the roof with specially designed ridge cap shingles. These shingles are specifically shaped to fit over the peak of the roof and provide a finished look while protecting the ridge vent.
Seal and clean up

After all the shingles are in place, it’s important to seal the edges and any exposed nails with roofing cement. This helps to prevent wind uplift and water infiltration. Finally, clean up any debris and ensure that the work area is clear of any leftover materials.
Conclusion
Installing roofing shingles requires attention to detail and a methodical approach. It’s crucial to follow the manufacturer’s guidelines and recommendations throughout the process to ensure that the roof is installed correctly. By taking the time to prepare the roof surface, install the shingles properly, and pay attention to the finishing details, you can ensure that your roof will provide reliable protection for years to come.
It is always best to consult with a professional roofing contractor. A well-installed roof not only enhances the aesthetic appeal of your home but also provides essential protection for you and your family. By following these steps and ensuring attention to detail throughout the installation process, you can help ensure a durable and visually appealing roof for years to come. Always remember to refer to manufacturer guidelines and local building codes to guarantee a successful roofing shingle installation.
Some frequently asked questions
How long does a shingle roof last?
Shingle roof lasts for 30-40 years with minimal maintenance.
Can Shingle roof be installed only by experienced guidance?
Yes, for the best result, experienced guidance is essential.
When to replace the roofing shingle?
After 30-40 years an expert should be consulted, or by seeing the condition of the shingle it can be understood whether to replace or not.
Do the shingle roof reduce energy costs?
Sure, but sometimes, it depends on the type of shingle in a particular weather condition.
Is the variety of shingle with colour and design options available everywhere?
Yes, in general it is available everywhere.
How long does it take in complete installation?
If professional methods are followed it would take 2-3 days depending on the size of the area to be covered.
How to get ready for the installation?
Cover the things with plastic sheet and remove things that are brittle before installation.
Will the things be damaged?
If proper preparation is taken nothing will be damaged.
What are the necessary precautions to be taken before installation?
Take all safety measures. Use platforms instead of ladder. Properly air vents are installed.